Do you need more specific instructions for a given project? Or, perhaps you have a more nuanced reason for your data collection needs. Find out how Asana Form can assist you in this matter by reading on.
What is Asana Form?
The project management tool Asana has features to add forms. Gathering data in Asana through forms is fast and simple. Users can now formulate detailed queries to ensure they receive all the data they require to complete a task. If you find that your team members are occasionally creating tasks with a bit too much room for interpretation, this is a useful tool for your own internal use as well.
How to Create Form?
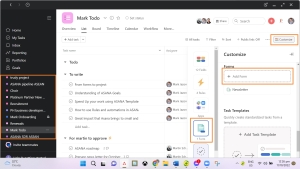
- Click one specific project
- Then click the customized tab.
- Next click the Form.
- Finally, click the Add Form
From ‘Add Form’ You Can Do the Following Things:
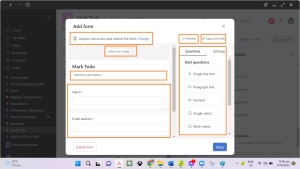
1. Add cover – Users can put some images in this area if they want. Just click the “add cover image” button and it will redirect you to your File Photos.
2. Set Privacy Settings – Users can change who can view and access their forms.
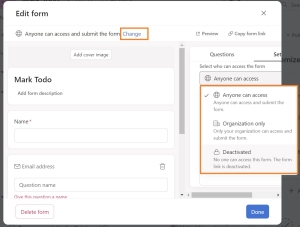
Anyone can access – anyone can access and submit your form.
Organization only – only your organization can access and submit your form.
Deactivated – No one can access this form. The form link is deactivated.
3. Add form description – Users can add descriptions about the form they created.
4. Add Name – Users can add their names or others.
5. Add Email address – Users can add their email address or their teammates’ email address.
6. Add Questions – Users can select from their question list which questions they want to include on their form. If you want to use one, you can simply drag one question onto your form.
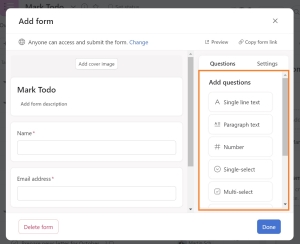
7. Preview – By clicking the preview, it will redirect users to another tab that shows a view of the form look like.
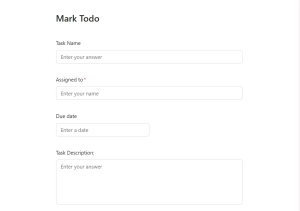
8. Copy form link – with one click, users can copy the link of the form and they can share them to others.
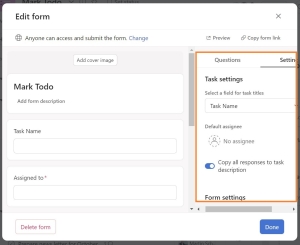
9. Additional Setting Option – User can use this additional option if they want to assign the form to themselves or to others or maybe they to share the link directly or to copy embed code.
How to Turn Your Form into Task?
You can use the form differently depending on what you want or need. Below is just an example of how to turn your form into a task.
1. Choose one specific project on your project list.
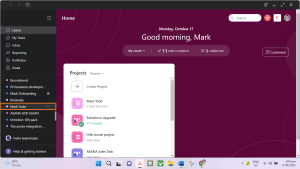
2. Click the customize button in your List and navigate the Form.
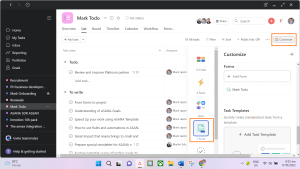
From here, you can add Form or edit a Form.
3. If you want to create a new form, click the Add Form option.
4. After that, you will now create your form templates, depending on what form you want to make.
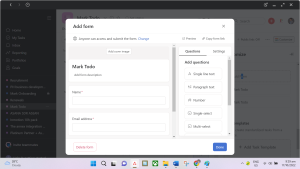
You can remove the email address and replace it with another question and add it again. You can add questions by dragging them from your question list. Also, you can rename those questions by writing in the text section.
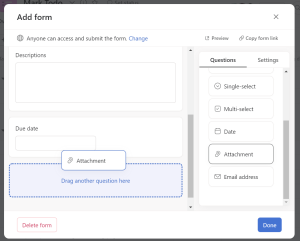
Dragging Question
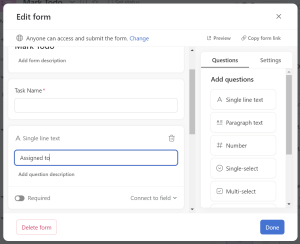
Renaming Question
5. When you are finished dragging and inserting questions, you can now review your form by clicking “Preview.”
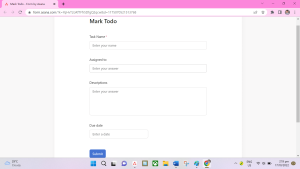
6. Fill out the form and click the submit button.
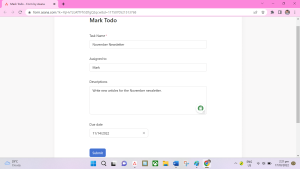
7. Go back to your List or Board and you can now view the form you made.
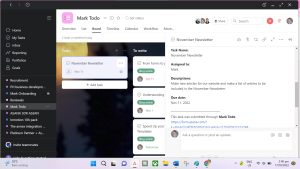
![]() If you want to change the task tittle of your form, go to the setting, and select field for a task tittle.
If you want to change the task tittle of your form, go to the setting, and select field for a task tittle.
Convert Form to Project
You can convert the form that has been added to your Task List to a Project. By simply clicking the three-dot option in your task.
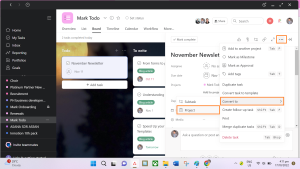
Once you click the Covert to Project option, a pop-up window will appear so you can change the name, assign a team, and use templates.
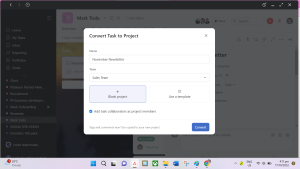
When done assigning to a team and choosing templates, you click the convert button, and it will turn into a project where you can add another set of tasks.

