Having a hard time repeatedly making project templates for your team? Worry not, Asana allows you to create your own templates and save them for future use with your team. Asana’s pre-made templates make it unnecessary to design workflows from scratch. Right from the start, you can have projects set up to monitor your progress.
To create a template for a new project in Asana, follow these steps:
- First, create a project by clicking the positive icon in the team section, or you can easily create one in Home.

![]() You can drag some widgets in Home by clicking the customize button at the upper right corner, including My Priorities, Projects, Notepad, People, Tasks I’ve Assigned, and My Goals.
You can drag some widgets in Home by clicking the customize button at the upper right corner, including My Priorities, Projects, Notepad, People, Tasks I’ve Assigned, and My Goals.
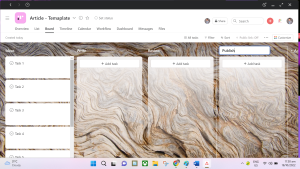
2. After you click the Create Project button, an option will appear whether you want to use templates from the library, import spreadsheets from another tool, or create a blank project where you can start from scratch. Since we are creating a new project template, I will be choosing the “blank project” option.

3. In a Blank Project, you can write the project name, assign specific teams, set privacy settings, and choose views of either List, Board, Timeline, or Calendar.

4. Next, after filling everything out, I clicked the continue button, and another option appeared. Here you can start adding tasks, sharing them with teammates, and setting up a workflow. To keep making the project template, I’ll just click the “Start adding tasks” button.


In this area, I have started adding tasks (6 tasks)
5. The next thing I do here is change the section names based on the process before publishing an article. So, I put ideas, write, review, and publish sections. You can add some extra sections too if you want by simply clicking the “+add section.”

6. Here I use some Custom Fields for my template. You can turn on the fields you want to add, and you can also create one by clicking the + Add Custom Field.


![]()
Project tasks in Asana can have extra information added to them with custom fields. Make a new column for whatever information is most useful to your process, group, or business, whether it’s a stage, priority, cost, or anything else. All employees can now see exactly what is being done across the company.
Here I created “Priority Level” and “Article for” Fields. This will help to add more details to the task. (See the images below)


7. After adding fields, I add rules to the template. You can either choose to automate the process by adding rules, or you can move the task to each category by hand.

![]() You can see a yellow lightning icon at the top of every section if there is an active rule. You can create your own rules by clicking the + Add Rule option. Once you are done creating rules, you can view them all below the Add Rule option.
You can see a yellow lightning icon at the top of every section if there is an active rule. You can create your own rules by clicking the + Add Rule option. Once you are done creating rules, you can view them all below the Add Rule option.
Do you still don’t know how to create rules? Check out our guide article on how to use rules and automation.
8. So far, I’ve added custom fields and rules. A template color and an icon will be set now. You can customize your project template logo further by selecting different colors and cute icons. If you click the arrow down next to the name of the template, you’ll see this option.

9. After I finished customizing the template’s color and icon, I navigated to and clicked Save as template. When I click it, it takes me to the Create Template button. Then, after clicking the “create template” button, I can see the project content, overview, and settings, where I can add more information about the template.
Click the Finish or Done button when you are through customizing your template’s settings. When you’re done, your templates will appear in your library.


11. Finally, whenever you create a new project, you can choose to use the template you made. If your template’s privacy is set to “public,” everyone in the company can view and use it.


