Are you a brand-new user of Asana? Or perhaps you still haven’t signed up yet but are interested in how it could help you manage your work. No need to worry! In this article, I will show you how to start with Asana. All you need to do is follow the Getting Started with Asana guide article.
I will not discuss all Asana features since our website has a blog article about Asana’s excellent features.
- Start by creating an Asana account. In creating an Asana account, you need to fill in your information.
- Once you have created your account, Asana will guide you on how to do your first project, and from that project, you will need to create a list of the tasks required to complete the project.
- Organize your project by creating sections, for example, To Do, Doing, and Done.
- Choose a view on how to like to see your project. Asana will ask you to set up your project views, such as List, Board, Timeline, or Calendar.
- After choosing your preferred project view, Asana will ask you to invite someone if you want to invite your teams. Still, if you’re going to try the application first to identify if Asana will benefit your business, you can skip it.
- Lastly, you can start trying all its features. You can see the project you created on the sidebar under the team section. And you can see what team you belong to (it was made while filling in the “What work do you do?” question, for example, if you enter Marketing, the team you will be in is in Marketing.)
What should you do as a beginner?
I understand you wanted to test out this platform with your team. Still, if you’re still determining whether you’ll use Asana as your organization’s work management software, test out some of its free features before inviting your team members.
Before we start with the tutorial, we will first review what features are available during your free 30-day trial of Asana.
Trying out Asana for free for 30 days is a great way to get a feel for the platform and see if it meets your needs if you’re looking for a project management tool to help you streamline your workflow and increase productivity.
Here are the basic and advanced features you can try on the 30-day free trial:
Basic features
- Task and project management
- Collaboration tools
- Project tracking
- Mobile app
- Integrations
Advanced feature
- Workflow Builder
- Admin Console
- Unlimited Dashboards
- Unlimited free guests
- Custom fields
- Advanced search
- Task Templates
Now, what will happen once the 30 days free trial ends? Well, it’s up to you to keep using Asana. If you want to keep using Asana, upgrade to the Basic, Premium, Business, or Enterprise plan. Check the Asana pricing plan here.
Let’s go back to the starter guide.
There are many features available in the 30-day free trial. But what should you do first as a beginner user?
Starting with the ability to create projects and tasks is the first step. Usually, Asana walks you through setting up an account and adding your first project, but this time I want you to create the projects your company uses and the list of tasks needed to finish each.
Before inviting your team, it’s better to create projects and tasks first, so all you have to do is assign your team members to the specific project or tasks they need to work on.
How to Create a Project in Asana?
This guide will show you how to create a project using the quick add button.
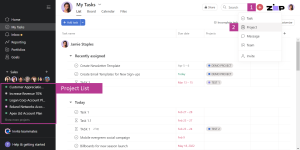
- Click the quick add button at the top bar.
- Click the Project option.
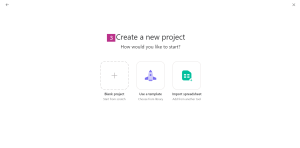
3. Choose one of the three options.
a. Blank project: Start from scratch.
b. Use a Template: Choose templates from the library.
c. Import Spreadsheet: Add from another tool.
And since you are a beginner, you need to start from scratch to be able to try how to create a project
4. Click the Blank Project option.
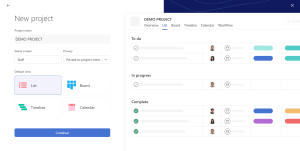
5. Enter your project name, select the team (since you still don’t have other teams, the only available team will be the team that Asana created automatically during your sign-up), and choose what kind of view you want for your project, then click continue.
List View: a list layout where you get a list of tasks with columns for additional information about the task—for example, the task assignee and due date.
Board View: your task will be viewed and tracked on the Kanban board. This is great if you are on a creative team who creates some graphic design or maybe for content writers where you can view your task as a sticky note.
Timeline View: Like the Gantt Chart view, you can see the relationship between tasks, work backward from deadlines, and stay on track (even if plans change).
Calendar View: Tasks can be visualized on a calendar, allowing you to detect overlaps and plan accordingly quickly.
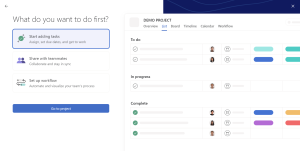
6. There will be three options after you click continue, but since this is a starter guide, click the Start adding tasks option and the Go to project button.
Congrats, you created a new project!
Assuming the project you created is for your creative team and intended for the members responsible for content writing, you need to create a list of tasks for them inside the project you created.
How to create and organize tasks?
Tasks are concrete items that need to be completed by a specific date and time, and they help establish who is responsible for what. It also keeps track of any files, notes, or guidelines that pertain to it, ensuring that everything is in one central location.
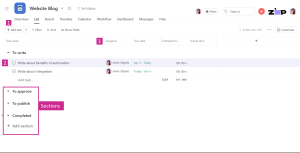
- Click the +Add task button below the overview option.
- Type the task name.
- You can use fields to add details such as who the assignee is and the task due. (Since you still don’t have any members, you can leave it blank for now.)
- You can create sections on the task list to organize the task on the project. As you can see in the image, if the project is intended for content writers, you can create sections such as To Write, To Approve, To Publish, and Completed/Published. This helps you categorize tasks and create workflow stages.
Check this Project Template for your reference:
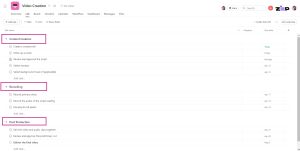
Asana has free project templates that you can use to save you time from creating Projects from scratch.
Now that you’ve set up some projects and tasks in Asana, it’s time to start sharing information and working with your team. If you’re the first person in your company to use Asana, invite a few colleagues to test it.
Since you are the first person who uses Asana, you must create a team before inviting your team members.
Are you wondering why you need to create a team in Asana? Well, it is an effective way to group your team members into specific teams—for example, Creative, Production, Sales, Marketing, etc. Teams are smaller groups within your organization that work together on particular projects or tasks. Each team worked on its tasks and communicated with its team administrators.
How to create a team?
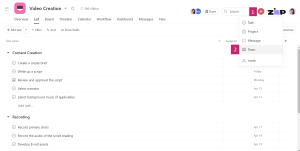
- Click the quick add button.
- Click the Team option.
Once you click the Team, you will be asked to create a team.
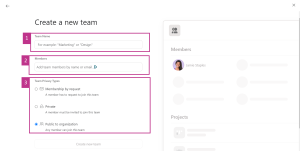
- Enter the team name, for example, Marketing or Design.
- Add members. (since you are the only person accessing Asana, you can add yourself first.)
- Set privacy type
a. Membership by request – Members will send you a request before joining the team.
b. Private – A member needs to be invited before joining the team.
c. Public to Organization – All your members can access and join the team.
How to invite your team members?
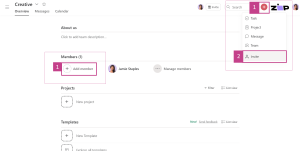
Invite your team members using the quick button on the top bar.
- Click the quick add button on the top bar.
- Click the invite option.
Or you can directly add members using the Add Member button.
Once you click Add Member button, a pop-up window will appear and allow you to invite email or invite with a link.
Invite with email option
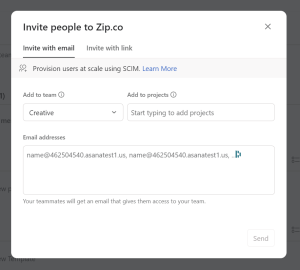
In this option, you need to choose what team the people you are inviting belong to. Once you select a specific team, type their email addresses below and press send.
Invite with Link
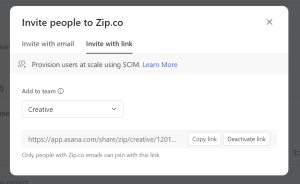
Invite with link means you must create a link and copy it to the people you want to invite.
Note: The link lets people with your company’s email domain join. A different email domain can’t join the team using this link.
People you invite will receive an invitation via email; all they need to do is accept it by clicking the Accept Invite button. See the sample image below.
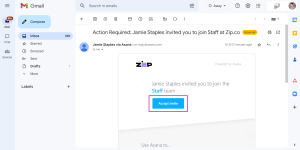
Once they accept your invitation, they will automatically join your organization, and you can add them to different teams or as project members. If they are members of a specific project, they can access the project information and the task it has to complete in a particular period.
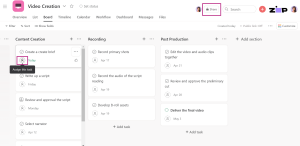
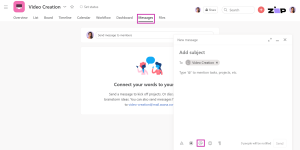
A team or Project allows you to start a conversation with your team to keep everyone updated. Everyone can now communicate without even having to access their email app. Moreover, you can get their attention by using the @mention function.
Inviting clients or freelancers with whom you work to use Asana is possible. Inviting and adding clients or freelancers to a project in Asana is similar to inviting team members. However, they have restricted access and can only view the project or any other shared information. With this, you can collaborate more effectively in Asana.
Do you still have questions about Asana’s capabilities and best practices? You can find detailed instructions on how to use the various Asana features in our blog article. Are you interested in Asana’s monthly update? If yes, send us your email address, and we’ll send you a monthly newsletter with all the latest Asana news.

